Help with Mac OS X
Adding a User
Installing XCode
Installing MacPorts
Find the Command Line
Help with Emacs
Getting Emacs (Mac/Linux)
Survival Emacs
Configure Emacs
Emacs Tricks
MOOS Mode for Emacs
Help with SSH, SSH-Keys, SCP
SSH Keys
Help with Command Line
Terminal Survival Basics
Making and Removing Things
Moving and Copying Files
Augment Your Shell Path
Customize Your Shell
Command Line Aliases
Using Interactive Mode
Tar Files
Help with Git
Starting with Git
The git log Command
The git move Command
The git clone Command
The git status Command
The git pull Command
The git add, rm Commands
The git commit Command
Help with Subversion
Starting with SVN
The svn checkout Command
The svn info, log Commands
The svn update Command
The svn status Command
The svn add, rm Commands
The svn mv Command
The svn commit Command
Set Up Your Own Repository
Help with LaTeX
Starting with LaTex
LaTex Starter Examples
Help with Course Software
Dowload Course Software
Run the Course Software
Launching the MOOSDB
Scoping the MOOSDB
Poking the MOOSDB
Launching MOOS w/ pAntler
Scripted MOOS Pokes
The MOOSApp Class
MOOS-IvP Message Parsing
MOOS-IvP String Utils
MOOS-IvP String Parse Utils
Behavior Utility Functions
2.680 Lab Submissions
Help Topic: Finding the Command Line Using the Terminal Application
Maintained by: mikerb@mit.edu  Get PDF
Finding the Command Line Using the Terminal Application
This topic describes how to get started using the Mac Terminal Application. Terminal provides a command-line interface to your system which we will use extensively. All Macs come with Terminal pre-installed, but it is not one of the applications in your Dock by default. This topic describes how to add it to your dock and configure a few basic properties of Terminal.

A Quick Note about the Finder Application on MacOS [top]
As perhaps a new Mac user, you may have noticed a distinct feature on the Mac, going back to its very earliest days, is that the top-most menu on your screen changes, depending on what application you are using. Two things remain constant though:
- The left-most item on the top menu bar is always the Apple icon which has a consistent set of pull-down menu options regardless of what application you are using.
- The next left-most item is the name of the current application. If you are using the Terminal app, it will say Terminal. If you are using Emacs, it will say Emacs, and so on.
The Finder application is a core application on your Mac. Unlike most other applications, it is always running. If you click anywhere on the desktop, outside any other application window, you will essentially be selecting the Finder application and you will notice the corresponding change on the menu bar. (try it!)
The Finder application is essentially an alternate universe compared to the command line environment. It provides a GUI based experience for navigating your computer. It is wonderfully intuitive, but the command line is infinitely more powerful. Nevertheless for some things we will reference the Finder application.
Getting Terminal to your Dock [top]
Open the Applications folder in Finder. You can do this with a shortcut by hitting Command-Shift-A anywhere on your desktop (outside an open application). The long way is to select the Go pull-down menu in Finder and select Applications.
- In the Applications folder, scroll down to near the end, and look for a Utilities folder. Open it and scroll down and look for the Terminal application.
- Drag and drop the Terminal icon to your dock.
- Now you may launch Terminal from the dock whenever you want a command-line interface.
Hints on Opening New Terminal Windows [top]
Clicking on the Terminal icon in the dock will not open multiple windows. This may seem a bit counter-intuitive to users new to MacOS. Below are some ways to open a new window:
- When Terminal is the active application (it says Terminal next to the Apple icon in the upper left of your window), you can open a new window by pulling-down the Shell pull-down menu, and select New Window.
- When Terminal is the active application, type the short-cut Command-n, to open a new window.
- When Terminal is the active application, type the short-cut Command-t, to open a new terminal as a Tab in an existing window (I use this a lot!).
- Control-click (or right-click, for two-button mouse users) the Terminal icon in the Dock. Select New Window.
Hints on the Configuring Terminal Application [top]
User preferences for Terminal may be set by selecting Settings from the Terminal pull-down menu. We point your attention to a couple things you may want to set:
- The Terminal preferences window has several tabs at the top. Select the Profiles tab. In the upper right there is a bar of buttons: Text, Window, Tab, Shell, and so on.
Select the Shell button.
In the Startup section, check the box that says Run command, and enter the command bash, as shown in Figure 1.1 below.
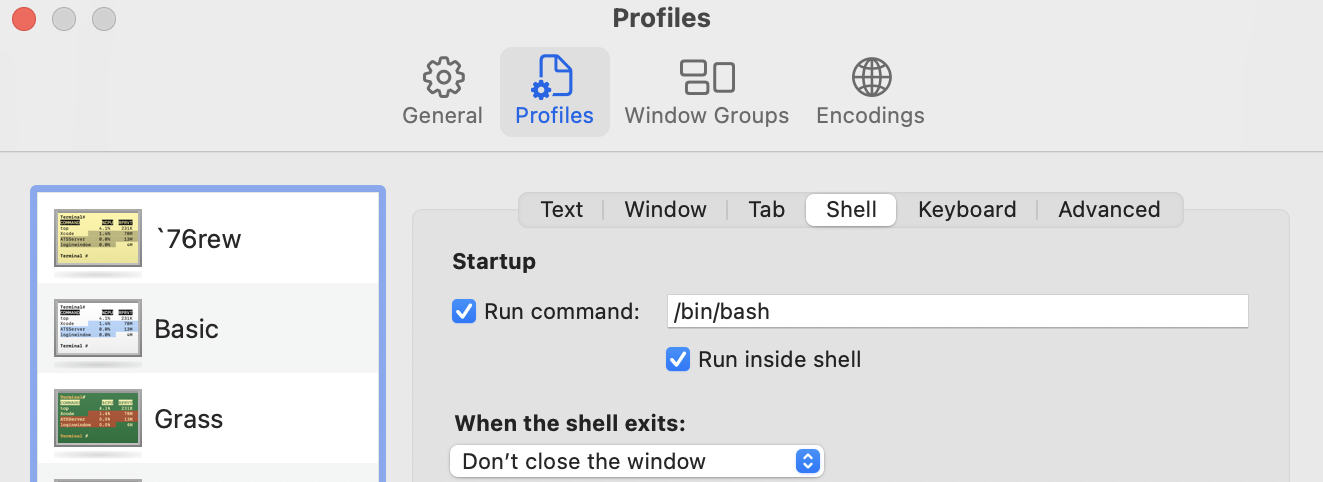
Figure 1.1: Setting the Shell to bash for the Terminal application.
- Under the Profiles tab, and the Window sub-tab, you can alter the default size of your window when it opens. Default is 80 columns and 24 rows. To change it, enter what you like in Columns and Rows fields as shown below.
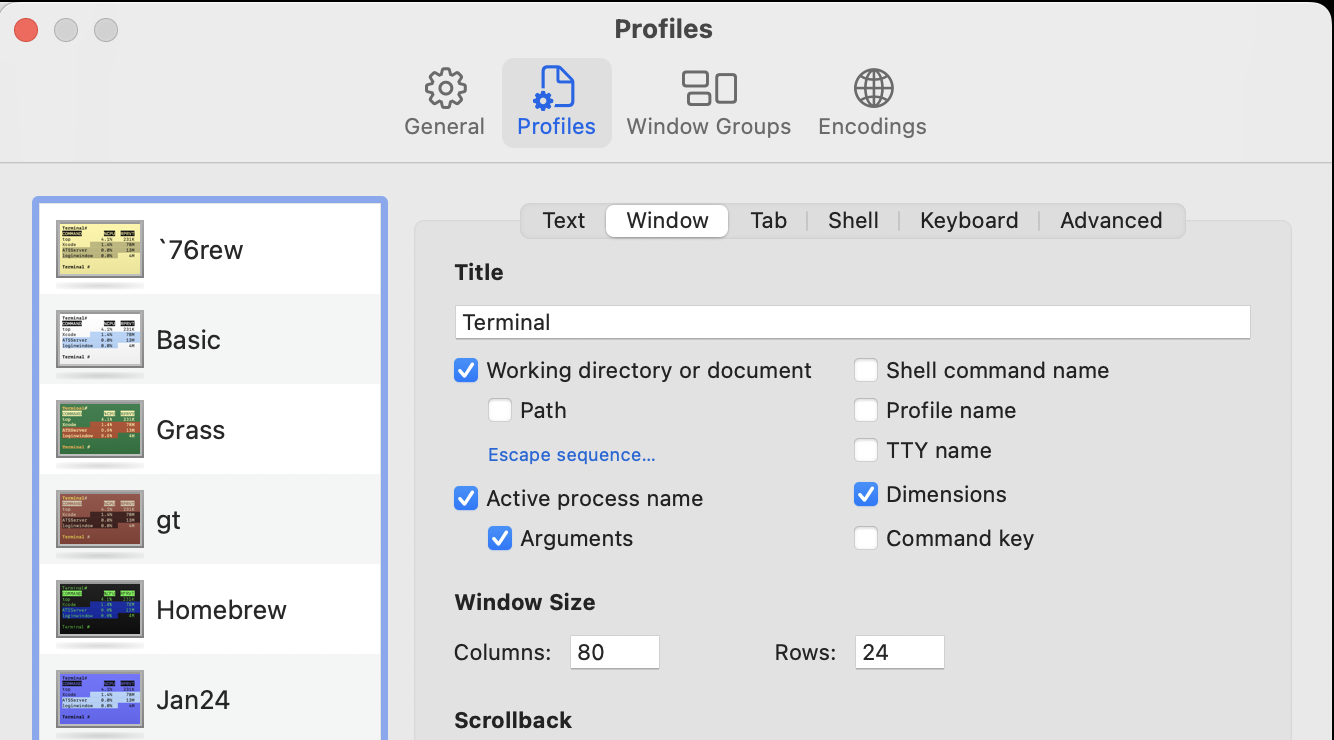
Figure 1.2: Setting the Terminal size in terms of columns and rows.
- Choose a background color that suits you. Very likely this will be the window/color your eyes will encounter the most in this and future labs. I recommend tinkering to get it best suited for you.
Random Historical Mac Notes:
- The Mac operating system is sometimes called "MacOS", and sometimes called "OSX". Apple used the latter for many years up until a few years ago before switching to the former. They mean the same thing.
- On a Mac laptop, there is only the track pad. The "mouse-click" is done by clicking the track pad. The Mac laptop "mouse-click" can be configured to be a tap on the track pad instead of a full push-down click. See the track pad section under the System Settings menu. There is no physical right-click, but there is indeed a whole bunch of stuff that can be accessed with a right-click. To achieve a right-click, hold down the control button and perform a normal left-click. Try right-clicking on the Desktop background and see what happens. If you buy a mouse from Apple it only has one button. But you can certainly buy a two-button mouse from another vendor and both buttons will be respected.
Document Maintained by: mikerb@mit.edu
Page built from LaTeX source using texwiki, developed at MIT. Errata to issues@moos-ivp.org. Get PDF