Help Topic: Installing and Using the Homebrew Package Manager
Maintained by: mikerb@mit.edu  Get PDF
Installing and Using the Homebrew Package Manager
We will use MacPorts or Homebrew occasionally in this class to install open source software packages as needed. Both package managers work perfectly fine for the purposes of 2.680. You do not need both package managers. If you already have MacPorts installed, you can safely skip installing Homebrew, and vice-versa.

Arguably there is greater adoption of Homebrew than MacPorts, and Homebrew is generally faster to install packages, but both are very fast in practice. In 2.680 we recommend Homebrew. But if you would like to use MacPorts, see:

https://oceanai.mit.edu/ivpman/help/osx_get_macports

This document describes how to obtain Homebrew and install needed packages for 2.680. If you're using a 2025 course-provided computer, Homebrew and most of the common packages are already installed. This topic is for someone using their own Mac for the class who may not have installed either package manager yet.

*Note: If you have a course computer, with Homebrew already installed, you still need to augment your shell path as described in the Section "Add Homebrew to Your Shell Path".

From the https://brew.sh page: Homebrew is the easiest and most flexible way to install the UNIX tools Apple didn’t include with MacOS. It can also install software not packaged for your Linux distribution to your home directory without requiring sudo.

Note: You need to have installed XCode before Homebrew may be installed. If you have not installed XCode yet, or if you are not sure, return to this topic an do so. A direct link is here:

http://oceanai.mit.edu/ivpman/help/osx_get_xcode.


Getting the Homebrew base [top]
Homebrew is a package manager that allows you to easily download software packages needed in our labs. But the package manager itself, the Homebrew base, first needs to downloaded and installed in the steps described here.

(In most Linux distributions, the analogous package manager (apt-get) is present with the out-of-the-box Linux installation. Perhaps because many Mac users are not developers, the steps of installing XCode and a package manager are left as options for developers.)

Here's how to get Homebrew:

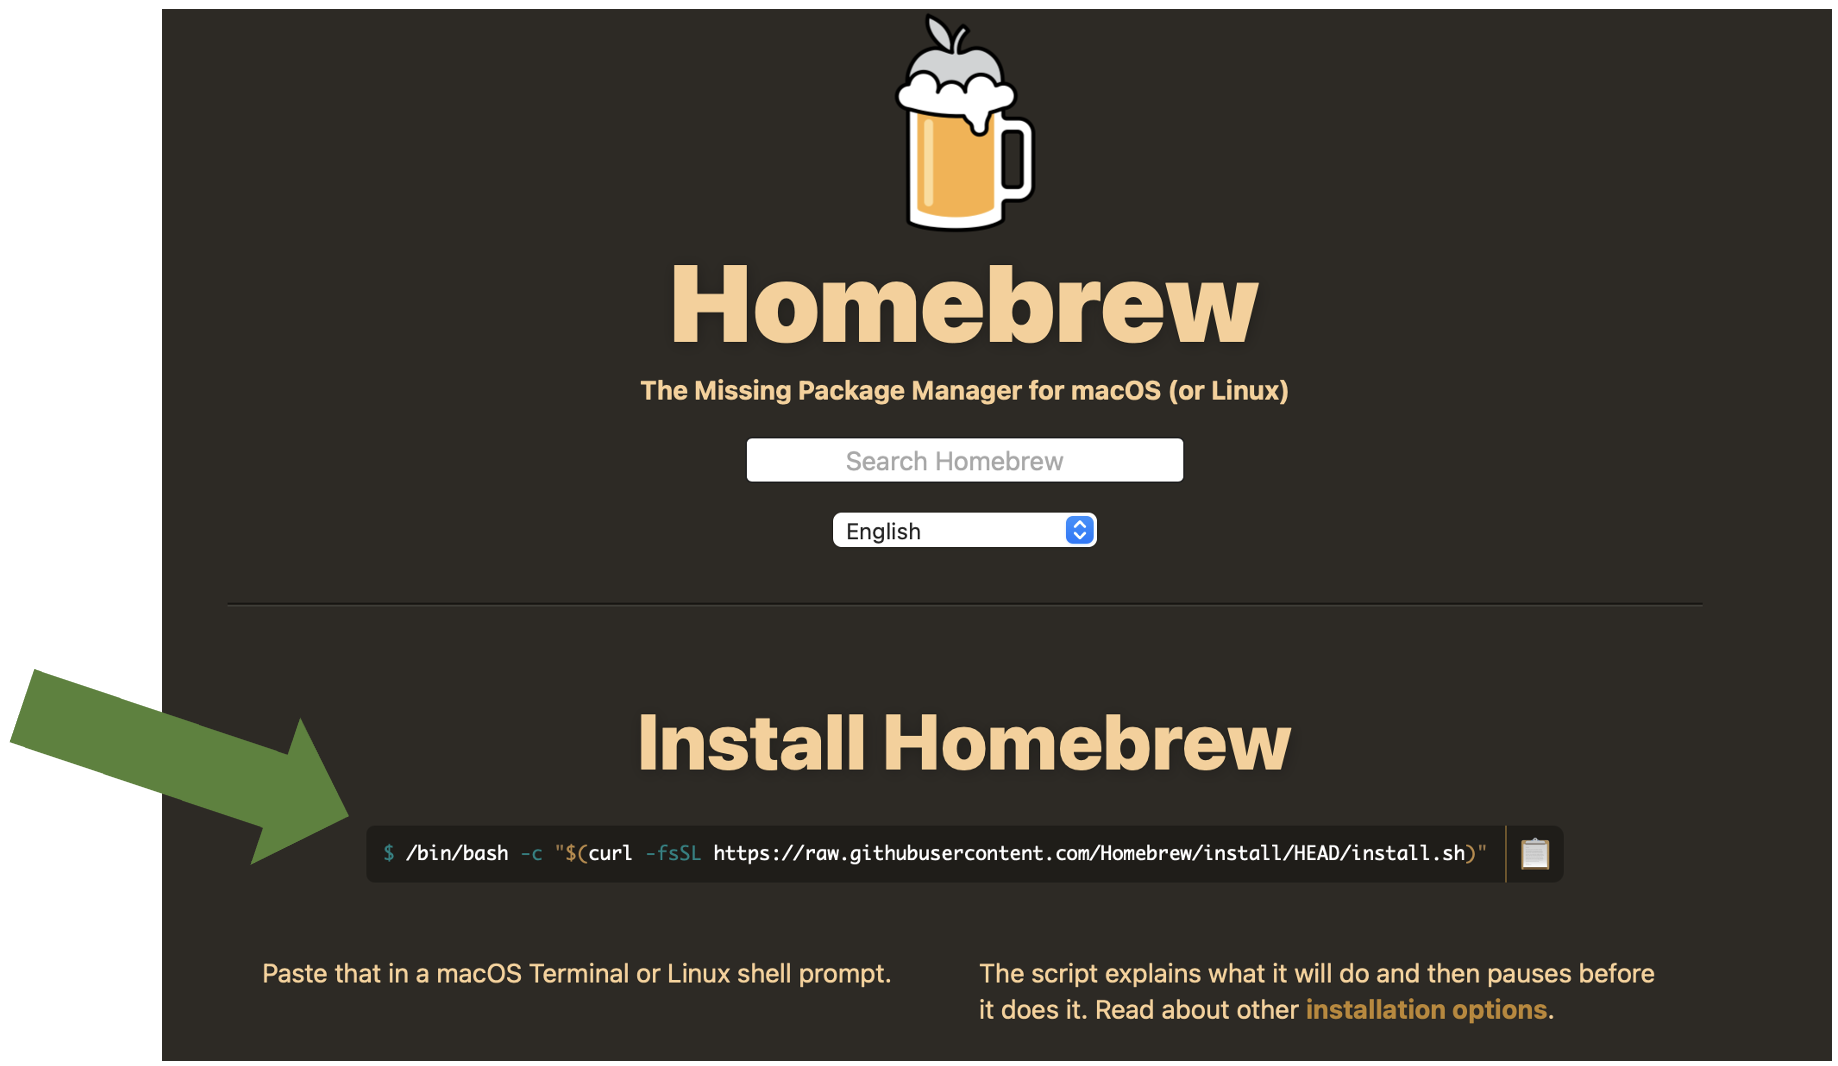
- Point your web browser to: https://brew.sh. At the very top of the page you will see "Installing Homebrew":


Figure 1.1: The Homebrew main page has instructions for obtaining Homebrew by cut-and-pasting the text in this window into your MacOS Terminal window.


- Follow the instructions to cut and paste the text into your terminal window and hit enter.
- Confirm that installation succeeded by checking that the brew command exists in the folder /opt/homebrew/bin, or in the folder /usr/local/bin. If not, see a TA.

Related Mac Note:

- Around 2022 Apple started selling MacBook laptops with their own M1 (and now M2 and M3) chips, instead of the Intel chips they had always used. For some reason, on the older Intel computers, homebrew would install all of its binaries in /usr/local/bin. And on the newer Apple M1 and M2 chip machines, homebrew would install binaries in /opt/homebrew/bin. (shrug emoji). You will need to know which case is you since this bin path will need to be added to your shell path in the steps described below.
- If you're not sure what type of processor you have, you can go to the Apple pull-down menu (upper left corner of your screen), select "About this Mac", which should be the very first option. The very first line should describe the Processor. Check if it says Intel or M1 (or M2).


Before you do anything else, let's install the wget command. It will come in handy very soon. Since the brew command is not yet in our shell path, we'll invoke it with its full path name:


$ /opt/homebrew/bin/brew install wget


Add Homebrew to Your Shell Path [top]
Homebrew packages are installed in /opt/homebrew/, (or /usr/local/bin per the above note on this issue). The brew command line tool should be installed in this bin directory, and you add it to your shell path. If you're not sure how to augment your shell path, see:

http://oceanai.mit.edu/ivpman/help/cmdline_augment_shell_path.


Download Packages Needed for our Labs [top]
Once Homebrew is installed, we need to use the Homebrew package manager to download and install common open source software packages used in this course. This part is relatively easy and is all done from the command line in a terminal window. Again make sure the brew command is in your shell path and then:

  $ brew install cmake
  $ brew install subversion
  $ brew install wget
  $ brew install libtiff
  $ brew install fltk


Or simply:


$ brew install cmake subversion wget libtiff fltk


- Note: Not all of the above packages result in an executable, i.e., program, installed on your machine. Some do, like cmake, wget, and svn from the subversion package. The others install libraries that other programs need later in the course.
- Hint: The brew install command accepts a list of packages on the command line like the last entry above. This obviates the need for re-typing your password each time.
- Hint: The brew list command, with no arguments, returns a list of already installed packages. You may notice a number of packages installed that you didn't request. The Homebrew package manager will also download dependency packages as-needed, to build the ones you did explicitly request.
- Hint: The brew leaves command, with no arguments, returns a list of installed packages that have been explicitly requested, as opposed to those that were installed because they were a dependency of a requested package.


Document Maintained by: mikerb@mit.edu
Page built from LaTeX source using texwiki, developed at MIT. Errata to issues@moos-ivp.org.
 Get PDF