Lab 7 - Low-level Control Systems of AUVs
1 Objectives
2 Updating your git branch with the latest class software features
2.1 Ensuring that you have committed all your local changes
2.2 Merging the 2.s01 branch into your own branch
2.3 Pushing your updated branch to the git remote server
3 Updating and rebuilding software using build_mitfs.sh script
3.1 Running build_mitfs.sh on the topside computer
3.2 Running build_mitfs.sh on the Raspberry Pi
4 Tuning the PID gains in software-in-the-loop simulations
4.1 Cleaning up past log files
4.2 Configuring PID gains for your AUV
4.3 Tuning the heading control sub-system} label{sec_heading_tuning
4.3.1 Observing the heading performance for the current PID gain setting
4.3.2 Changing heading PID gains
4.4 Tuning the depth and pitch control sub-systems
4.5 Exercise: tuning the heading, depth and pitch PID control sub-systems
4.6 Exercise: Pushing your tuned PID gains to the git remote server
5 Testing the tuned PID gains by conducting hardware in the loop simulations
5.1 Updating the software
5.2 Running a hardware-in-the-loop simulation
5.3 Exercise: Downloading logs and post-mission data visualization
1 Objectives
- Learning how to merge git branches.
- Learning how to update and rebuilt software using the build_mitfs script.
- Learning how to conduct post-mission analysis of vehicle data.
- Understanding the effects of PID gains on the control performance of an AUV.
- Understanding how to tune PID gains of an AUV using trial-and-error method.
2 Updating your git branch with the latest class software features
This week, we have updated the MITFrontseat software stack with a number of new features. To obtains these features, you will need to update the 2.s01 git branch of MITFrontseat, MITFrontseat-drivers and missions-seabeaver repositories, and re-build them. However, as part of the Underwater Navigation lab, you created a new git branch of missions-seabeaver with your own vehicle's name (e.g. in my case, a branch named avi). In order to pull the code changes that instructors made in the 2.s01 branch into your own branch, you will need to merge the 2.s01 branch into your own branch. We highly recommend you to read more about git merging on your own time (https://git-scm.com/book/en/v2/Git-Branching-Basic-Branching-and-Merging).
2.1 Ensuring that you have committed all your local changes [top]
Before we merge the 2.s01 branch into your own branch, it is good practice to check the status of your branch and make sure there are no uncommitted local changes on your topside laptop:

 $ git status
 On branch avi
 Your branch is up to date with 'origin/avi'.

 nothing to commit, working tree clean
In my case, the avi branch is does not have any modified files that are not committed, or untracked files. So I am ready to merge. However, if you have untracked files or code modifications that are not committed, you might see something similar to this:
 $ git status
 On branch avi
 Your branch is up to date with `origin/avi'.

 Untracked files:
   (use "git add <file>..." to include in what will be committed)
 	vehicle/avi.def
 	vehicle/avi_sensor_config.txt

 nothing added to commit but untracked files present (use "git add" to track)
In this case you may choose to either destroy these changes using $ git reset --hard command or commit these changes (see the Underwater Navigation lab for more information).
2.2 Merging the 2.s01 branch into your own branch [top]
Before we merge, let's ensure that we have pulled the updates to 2.s01 on to your local topside computer. To do that, let's switch to that branch using $ git checkout 2.s01 command:
 $ git checkout 2.s01
 Switched to branch '2.s01'
 Your branch is up to date with 'origin/2.s01'.
Pull the changes to 2.s01 from the git remote server on to your topside laptop using $ git pull origin 2.s01 command:
 $ git pull origin 2.s01
 Warning: the ECDSA host key for 'github.com' differs from the key for the IP address '140.82.112.4'
 Offending key for IP in /home/sb-topside-15/.ssh/known_hosts:4
 Matching host key in /home/sb-topside-15/.ssh/known_hosts:60
 Are you sure you want to continue connecting (yes/no)? yes
 From github.com:supun-randeni/missions-seabeaver
  * branch            2.s01      -> FETCH_HEAD
 Already up to date.
Let's switch back to your own branch (in my case, the branch named avi - using $ git checkout avi command). It will very important that you do this properly. Otherwise, you might merge your own branch into the 2.s01 branch.
 $ git checkout avi
 Switched to branch 'avi'
 Your branch is up to date with 'origin/avi'.
Finally we can merge the changes to 2.s01 branch into your own branch using $ git merge 2.s01 command:
$ git merge 2.s01
A terminal window might pop up with nano text editor, asking to the enter a comment about this merge. You may enter a comment and exit by pressing ctrl+x key. Then you should see an output similar to the follows:
 $ git merge 2.s01
 Merge made by the 'recursive' strategy.
  build_scripts/build_mitfs.sh                   | 145 ++++++++++++++++++++++++++++++++++++++++++++++++++++
  cruise/lab_7_control.def                       |  22 ++++++++
  cruise/lab_7_control_pMITFS_MissionScript.plug |  44 ++++++++++++++++
  3 files changed, 211 insertions(+)
  create mode 100755 build_scripts/build_mitfs.sh
  create mode 100644 cruise/lab_7_control.def
  create mode 100644 cruise/lab_7_control_pMITFS_MissionScript.plug
If you and the instructors both have edited the same file (which should not be the case here, but it will likely happen in the future), you will get a warning about a merge conflict. In such situations both parties need to discuss and resolve the merge conflict. In case if you see a merge conflict, please contact the instructors.
2.3 Pushing your updated branch to the git remote server [top]
By merging 2.s01 branch into your own branch, you have made some changes to your own branch in the topside computer. We call them local changed. Now you need to push them to the git remote server, so the latest version of your branch (e.g., avi branch in my case) can also be pulled on to your Raspberry Pi and PocketBeagle later:
 $ git push origin avi
 Warning: the ECDSA host key for 'github.com' differs from the key for the IP address '140.82.113.4'
 Offending key for IP in /home/sb-topside-15/.ssh/known_hosts:9
 Matching host key in /home/sb-topside-15/.ssh/known_hosts:60
 Are you sure you want to continue connecting (yes/no)? yes
 Enumerating objects: 4, done.
 Counting objects: 100% (4/4), done.
 Delta compression using up to 16 threads
 Compressing objects: 100% (2/2), done.
 Writing objects: 100% (2/2), 282 bytes | 282.00 KiB/s, done.
 Total 2 (delta 1), reused 0 (delta 0)
 remote: Resolving deltas: 100% (1/1), completed with 1 local object.
 To github.com:supun-randeni/missions-seabeaver.git
    15e9fd6..fed544d  avi -> avi
3 Updating and rebuilding software using build_mitfs.sh script
As we dsicussed in the Underwater Navigation lab, updating and rebuilding the software on the vehicle was a lengthy process with several steps:
- Update and rebuild MITFrontseat on the topside laptop
- Update and rebuild MITFrontseat-drivers on the topside laptop
- Update missions-seabeaver on the topside laptop
- Update and rebuild MITFrontseat on the Raspberry Pi
- Update and rebuild MITFrontseat-drivers on the Raspberry Pi
- Update missions-seabeaver on the Raspberry Pi
- Update and rebuild MITFrontseat on the PocketBeagle
- Update and rebuild MITFrontseat-drivers on the PocketBeagle
- Update missions-seabeaver on the PocketBeagle
It was important for you to know this process in order to understand the software architecture. However, now we are introducing to an automated shell script that will simplify this process.
The build_mitfs.sh script will automatically update (i.e. git pull) MITFrontseat, MITFrontseat-drivers and missions-seabeaver to the latest versions of their respective branches. Then it will rebuild MITFrontseat and MITFrontseat-drivers. More interestingly, if you run this script on the Raspberry Pi, it will update and rebuild software on the Raspberry Pi as well as on the PocketBeagle.
Please note that build_mitfs.sh does not change the branches. It will simply update the current branch that you are in. If you need to change a branch, you will still need to manually do it.
3.1 Running build_mitfs.sh on the topside computer [top]
This script is located at missions-seabeaver/build_scripts/build_mitfs.sh. Let's change the directory and run the script:
 $ cd ~/missions-seabeaver/build_scripts
 $ ./build_mitfs.sh
It will first show the current branches that your topside laptop is in. followed up an update and rebuild:
 $ ./build_mitfs.sh

 Building MITFrontseat on sb-topside-15..

 MITFrontseat is available.
 MITFrontseat is in branch:  2.s01

 MITFrontseat-drivers is available.
 MITFrontseat-drivers is in branch:  2.s01

 missions-seabeaver is in branch:  avi

 Updating MITFrontseat..
 Warning: the ECDSA host key for 'github.com' differs from the key for the IP address '140.82.114.3'
 Offending key for IP in /home/sb-topside-15/.ssh/known_hosts:6
 Matching host key in /home/sb-topside-15/.ssh/known_hosts:60
 Are you sure you want to continue connecting (yes/no)? yes
 Already up to date.

 Updating MITFrontseat-drivers..
 Warning: the ECDSA host key for 'github.com' differs from the key for the IP address '140.82.114.3'
 Offending key for IP in /home/sb-topside-15/.ssh/known_hosts:6
 Matching host key in /home/sb-topside-15/.ssh/known_hosts:60
 Are you sure you want to continue connecting (yes/no)? yes
 Already up to date.

 Updating missions-seabeaver..
 Warning: the ECDSA host key for 'github.com' differs from the key for the IP address '140.82.114.3'
 Offending key for IP in /home/sb-topside-15/.ssh/known_hosts:6
 Matching host key in /home/sb-topside-15/.ssh/known_hosts:60
 Are you sure you want to continue connecting (yes/no)? yes
 Already up to date.

 Sending build command to MITFrontseat-drivers on sb-topside-15..
Once building is complete, it is important to scroll up and inspect the output to ensure that there are no build errors.
3.2 Running build_mitfs.sh on the Raspberry Pi [top]
This script is a new feature that was added recently. Therefore, you will need to update missions-seabeaver repository on both Raspberry Pi and PocketBeagle before being able to use it. Run the following commands on both Raspberry Pi and PocketBeagle to update:
 $ cd ~/missions-seabeaver/
 $ git pull
From now on, you can simply run build_mitfs.sh on the Raspberry Pi, and it will automatically update (i.e. run git pull) MITFrontseat, MITFrontseat-drivers and missions-seabeaver to the latest versions of their respective branches, and rebuild MITFrontseat and MITFrontseat-drivers. Then, it will also update and rebuild software on the PocketBeagle. To run build_mitfs.sh script:
 $ cd ~/missions-seabeaver/build_scripts
 $ ./build_mitfs.sh
Let it update and build.. Once building is complete, please scroll up and inspect the output to ensure that there are no build errors.
4 Tuning the PID gains in software-in-the-loop simulations
During the lecture ``Low-level Control Systems of AUVs", we discussed about the proportional-integral-derivative (PID) control algorithm, and that tuning of the P, I and D gains is critical to obtain good control performance. In this section of the lab, we will try to tune the control gains of your vehicle by conducting software-in-the-loop simulations.
The PID tuning approach that we will use in this class is called `trial-and-error' method. In this approach, we will adjust the Kp, Ki and Kd gains, one at a time, while keeping in mind how each gain affects the control performance. For example,
- You will conduct a PID tuning mission.
- Download the log files to the topside computer (i.e. only if you are running the experiment in hardware-in-the-loop simulations or in-water by conducting actual deployments).
- Visualize data using the alogview tool, and examine the motion response of the vehicle.
- Decide which gains need to be adjusted, and make the change in the vehicle definition file.
- Conduct the PID tuning mission again with the updated PID gains.
- Repeat..
Later in this class, we will follow the same steps to tune the PID gains of your actual vehicle by conducting in-water experiments. Therefore, it is useful for you to get familiar with the PID tuning process in software-in-the-loop simulations, where you can make mistakes and learn.
4.1 Cleaning up past log files [top]
Every time you launch a MOOS community, a MOOS log file is automatically generated. This happens in all computers; i.e. the topside laptop, Raspberry Pi and PocketBeagle. In each computer, these files are generated in the directory: missions-seabeaver/logs. If a particular log file is important to you (e.g. you should keep log files from all in-water experiments that you conduct), you should copy it to a different place. Once you copied the logs that are important to you, missions-seabeaver/logs directory can be cleared by running the clean_logs.sh script:
 $ cd ~/missions-seabeaver/
 $ ./clean_logs.sh
Don't forget that this directory exists in all three computers, and logs will be generated in them (i.e. topside logs in the topside computer, backseat logs in the Raspberry Pi, and frontseat logs in the PocketBeagle). Therefore, it is important that you clean logs in all three.
4.2 Configuring PID gains for your AUV [top]
In Underwater Navigation lab you created a definition file for your own vehicle in missions-seabeaver/vehicle directory. For instance, for the AUV named avi, these definition files are as follows:
- avi.def
- avi_sensor_config.txt
Please inspect the *.def file for your vehicle (e.g. avi.def) using your favorite text editor. Around like 87, under the section PID control related, you will see the PID gain settings of your vehicle:
 // ************************************************************************************************
 // PID control related
 // ************************************************************************************************
 #define ENABLE_TRI_FIN_HEADING_CONTROL    true
 #define ELEVATOR_HEADING_CONTROL_PERCENT  50

 #define PROP_MODE_VEHICLE_PITCH_LIMIT     20

 #define PROP_MODE_ROLL_KP                 0
 #define PROP_MODE_ROLL_KI                 0
 #define PROP_MODE_ROLL_KD                 0
 #define PROP_MODE_ROLL_MAX_INTEGRAL       10

 #define PROP_MODE_PITCH_KP                0.5
 #define PROP_MODE_PITCH_KI                0
 #define PROP_MODE_PITCH_KD                0
 #define PROP_MODE_PITCH_MAX_INTEGRAL      5

 #define PROP_MODE_DEPTH_KP                20
 #define PROP_MODE_DEPTH_KI                0.2
 #define PROP_MODE_DEPTH_KD                0
 #define PROP_MODE_DEPTH_MAX_INTEGRAL      6

 #define PROP_MODE_HEADING_KP              0.3
 #define PROP_MODE_HEADING_KI              0
 #define PROP_MODE_HEADING_KD              0.8
 #define PROP_MODE_HEADING_MAX_INTEGRAL    10

 #define PROP_MODE_SPEED_KP                20
 #define PROP_MODE_SPEED_KI                0.5
 #define PROP_MODE_SPEED_KD                0
 #define PROP_MODE_SPEED_MAX_INTEGRAL      50

 #define PROP_MODE_SPEED_CURVE             0.9:30 | 0.7:25 | 0.3:10 | 1.3:40
Let's see what each of these parameters mean, and their effects towards the control performance of the vehicle.
4.3 Tuning the heading control sub-system} label{sec_heading_tuning [top]
The PID gains for the heading sub-system are defined under following section of the *.def file:
 #define PROP_MODE_HEADING_KP              0.3
 #define PROP_MODE_HEADING_KI              0
 #define PROP_MODE_HEADING_KD              0.8
 #define PROP_MODE_HEADING_MAX_INTEGRAL    10
For example, the P gain for the heading sub-system (PROP_MODE_HEADING_KP) is currently set to 0.3. It can be changed by editing this file.
4.3.1 Observing the heading performance for the current PID gain setting [top]
Before we start tuning, let's run a simulation and observe the control performance for the current PID gains. We have created a new cruise called lab_7_control for PID tuning. This mission has five legs, each at a constant heading, conducting a zig-zag pattern run. Recall that we need to configure the architecture, vehicle and cruise before running the mission (in my case, the AUV name is avi):
 $ cd ~/missions-seabeaver/launch_scripts/
 $ ./configure_architecture.sh seabeaver_ii
 $ ./configure_vehicle.sh avi
 $ ./configure_cruise.sh lab_7_control
Now you can launch the mission in software-in-the-loop simulation (I am running the simulation 5 times faster than real-time):
$ ./launch_simulation.sh 5
The pMarineViewer window will pop up, and you will see the vehicles moving. Once the mission ended, lets visualize the logs using alogview. Go to the directory where logs are generated, and list all the files:
 $ cd ~/missions-seabeaver/logs/
 $ ls
 LOG_SB2_ALPHA_Backseat_30_4_2024_____22_04_12  LOG_SB2_ALPHA_Frontseat_30_4_2024_____22_04_12  LOG_SB2_ALPHA_VECTORS_30_4_2024_____22_04_12  LOG_VECTORS__hydro_summary_.txt
 LOG_SB2_ALPHA_Backseat_30_4_2024_____22_10_46  LOG_SB2_ALPHA_Frontseat_30_4_2024_____22_10_45  LOG_SB2_ALPHA_VECTORS_30_4_2024_____22_10_46
Since we run three MOOS communities in the topside computer during simulations, you can see logs from all three (i.e. backseat MOOS community, frontseat MOOS community, and VECTORS MOOS community). For PID tuning, we are only interested in the backseat MOOS community. In my case, I have logs from previous missions as well. Therefore we need to choose the correct log file. Usually it is the latest one (i.e. LOG_SB2_ALPHA_Backseat_30_4_2024_____22_10_46). Let's visualize it using alogview:
 $ cd LOG_SB2_ALPHA_Backseat_30_4_2024_____22_10_46/
 $ alogview LOG_SB2_ALPHA_Backseat_30_4_2024_____22_10_46.alog
The alogview window shown in Figure 4.1 will pop up.
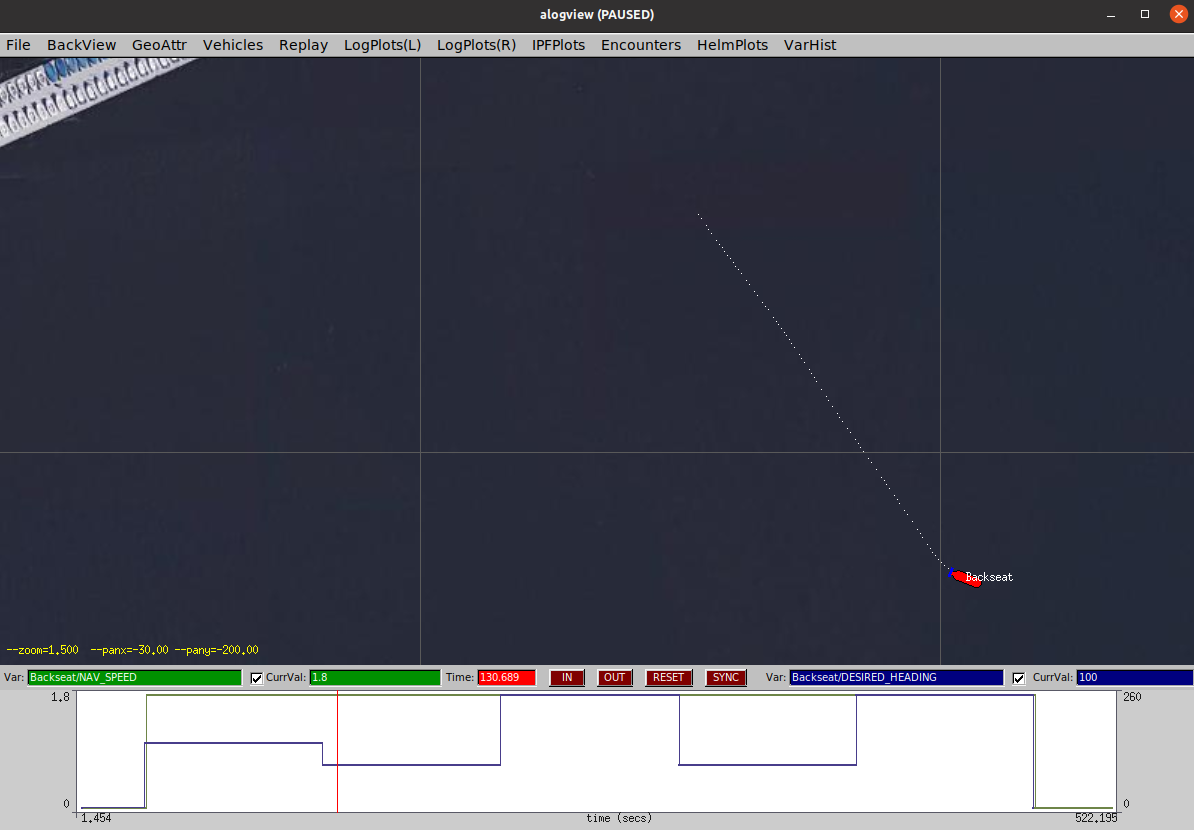
Figure 4.1: The alogview window
In alogview, you are able to plot time-series data (https://oceanai.mit.edu/ivpman/pmwiki/pmwiki.php?n=IvPTools.ALogView##sec_alogview). For example, you can plot the variation of DESIRED_HEADING and NAV_HEADING with time. For example, load NAV_HEADING in LogPlots(L) pull-down menu, and DESIRED_HEADING in LogPlots(L) pull-down menu. You will see a response similar to Figure 4.2. Plot the following MOOS variables, and try to understand their responses:
- DESIRED_HEADING
- DESIRED_DEPTH
- DESIRED_SPEED
- LOG_PID_DESIRED_PITCH
- NAV_HEADING
- NAV_DEPTH
- NAV_SPEED
- NAV_PITCH
- LOG_PID_HEADING_ERROR
- LOG_PID_DEPTH_ERROR
- LOG_PID_PITCH_ERROR
- UPPER_RUDDER
- STBD_ELEVATOR
- PORT_ELEVATOR
- PROPELLER

Figure 4.2: Time-series data of DESIRED_HEADING and NAV_HEADING
4.3.2 Changing heading PID gains [top]
Now you can experiment with different Kp, Ki and Kd gains of the heading sub-system and observe the variation in the motion response (e.g. values such as 0.1, 0.2, 0.4, 0.8, 1.6) for each gain.
4.4 Tuning the depth and pitch control sub-systems [top]
As we discussed during the ``Low-level Control Systems of AUVs" lecture, the depth control of under-actuated AUVs is achieved in two steps. That is, as shown in Figure 4.3, (1) the depth control sub-system computes the desired pitch angle of the AUV to minimize the depth error, and (2) the pitch control sub-system computes the elevator angle to minimize the pitch error.

Figure 4.3: Low-level control sub-systems of SeaBeaver II AUVs
The PID gains for the depth and pitch sub-system are defined under following section of the *.def file:
 #define PROP_MODE_PITCH_KP                0.5
 #define PROP_MODE_PITCH_KI                0
 #define PROP_MODE_PITCH_KD                0
 #define PROP_MODE_PITCH_MAX_INTEGRAL      5

 #define PROP_MODE_DEPTH_KP                20
 #define PROP_MODE_DEPTH_KI                0.2
 #define PROP_MODE_DEPTH_KD                0
 #define PROP_MODE_DEPTH_MAX_INTEGRAL      6
Following the same procedure described in Section ???, try to change the PID gains of both depth and pitch sub-systems (one at a time), and observe the response.
4.5 Exercise: tuning the heading, depth and pitch PID control sub-systems [top]
Tune the heading, depth and pitch PID gains to obtain a decent control response of the vehicle. Please ensure that the rudder and elevators are not oscillating at a very high frequency by plotting the time-series responses of UPPER_RUDDER, STBD_ELEVATOR and PORT_ELEVATOR MOOS variables.
4.6 Exercise: Pushing your tuned PID gains to the git remote server [top]
Once you are satisfied with the control performance, you should conduct a hardware-in-the-loop simulation using these new PID gains. To transfer these new gains to the Raspberry Pi and PocketBeagle, we need to commit the changes and push them to your branch in the git remote server. If you don't remember how to do this, please follow the relavant steps in the Underwater Navigation lab.
5 Testing the tuned PID gains by conducting hardware in the loop simulations
Once you pushed the updated gains to your branch in the git remote server, we can pull them to the Raspberry Pi and PocketBeagle to test the new gain in hardware-in-the-loop simulations.
5.1 Updating the software [top]
We can utilize the new build_mitfs.sh script to update and rebuild the software on the two embedded computers. It's important to remember that this script won't alter git branches; rather, it will update the current branches of MITFrontseat, MITFrontseat-drivers, and missions-seabeaver. Therefore, please ensure that missions-seabeaver on both the Raspberry Pi and PocketBeagle are in the correct branch.
 $ cd ~/missions-seabeaver/build_scripts
 $ ./build_mitfs.sh
Let it update and build..
We regularly update MITFrontseat, MITFrontseat-drivers and missions-seabeaver repositories. Therefore, we strongly recommend running this script first each day when you turn on the vehicle.
5.2 Running a hardware-in-the-loop simulation [top]
Once you updated the embedded computers with your tuned PID gains, you can run a hardware-in-the loop simulation to test new gains. If you don't remember how to run hardware-in-the-loop simulations, please refer to Software and Hardware in the Loop Simulations lab.
If you are running the hardware-in-the-loop simulations on the actual AUV (i.e. not the training-kit), please do not run the thruster for more than 30 seconds continuously. Prolonged operation in air can lead to overheating of the thruster.
5.3 Exercise: Downloading logs and post-mission data visualization [top]
Finally, you can download the log files (using scp command) from the Raspberry Pi to your topside laptop, and visualize them using alogview tool. Create a directory on your topside laptop where you want to store your logs. For instance, I have created a folder named avi_logs, and within it, a sub-folder with today's date:
 $ cd ~
 $ mkdir avi_logs
 $ cd avi_logs
 $ mkdir 20240430
 $ cd 20240430
Now you can copy the logs to this folder using secure-copy:
$ scp -r seabeaver-raspi@10.42.0.5:/home/seabeaver-raspi/missions-seabeaver/logs/LOG* .
Now you can visualize these logs using alogview.
Document Maintained by: supun@mit.edu
Page built from LaTeX source using texwiki, developed at MIT. Errata to issues@moos-ivp.org.  Get PDF